The post Poha Chiwda appeared first on SpicenSweet.
]]>Poha Chiwda as called in Marathi, is a Namkeen or snack made using poha/rice flakes. Poha Chiwda is a very popular snack in Maharashtra. This namkeen/snack is mainly made during Diwali festival. But now a days it can be made conveniently anytime as a snack. Along with Poha Chiwda many other snack and sweets are also prepared during Diwali, but Chiwda being the most liked one is made in large quantity.
The preparation starts few days before Diwali as the list is long. There is Chiwda, chakli, shakarpala, shev/bhujiya, Anarse, karangi, ladu called ladoo in Hindi.
In India it is tradition of preparing the snacks and sweets at home … it makes a difference!!! I still remember I use to help my mother preparing all these snacks. Even today I make it at home during Diwali and also teach my daughter and son to follow the culture & tradition.
You can also try my other recipes of snacks like
Poha Chiwda is mainly prepared by two ways. In the first method poha is roasted and then mix with other spices . The other way is to deep fry the poha and then mixing with the spices. Both the Chiwda differs a lot in taste. The taste of chiwda is different in both the methods.
Here I’m sharing the second way of making the poha chiwda.
Ingredients:
- Poha(mota/thick) – 1 kg
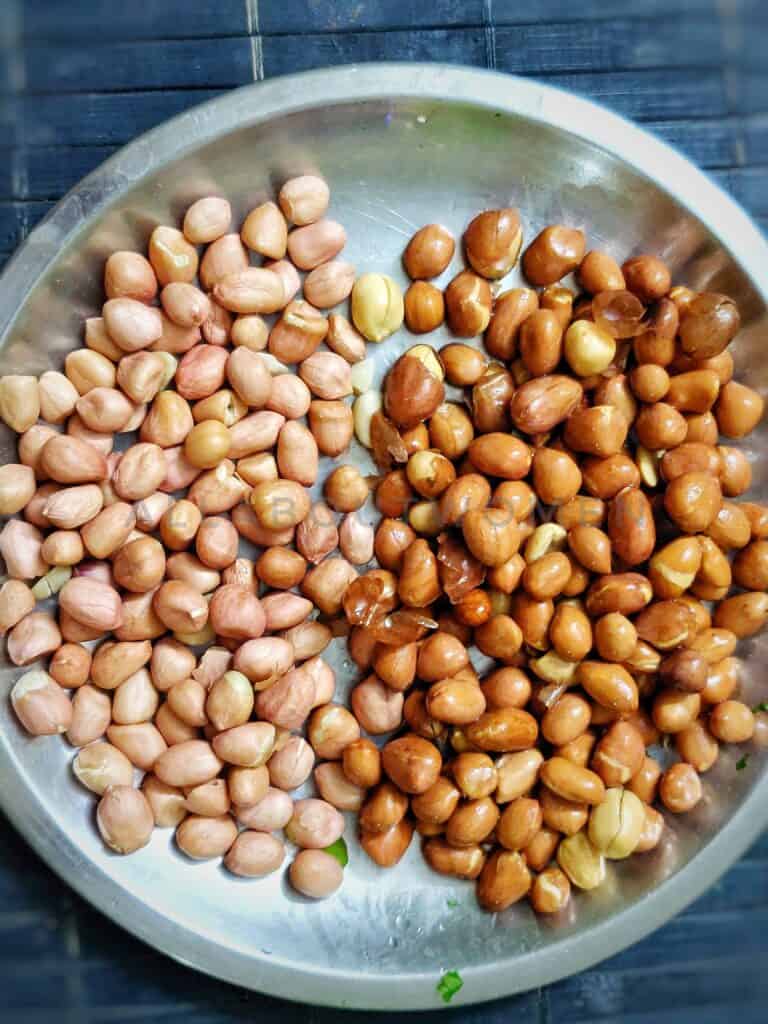
- Peanut – 1 ½ cup
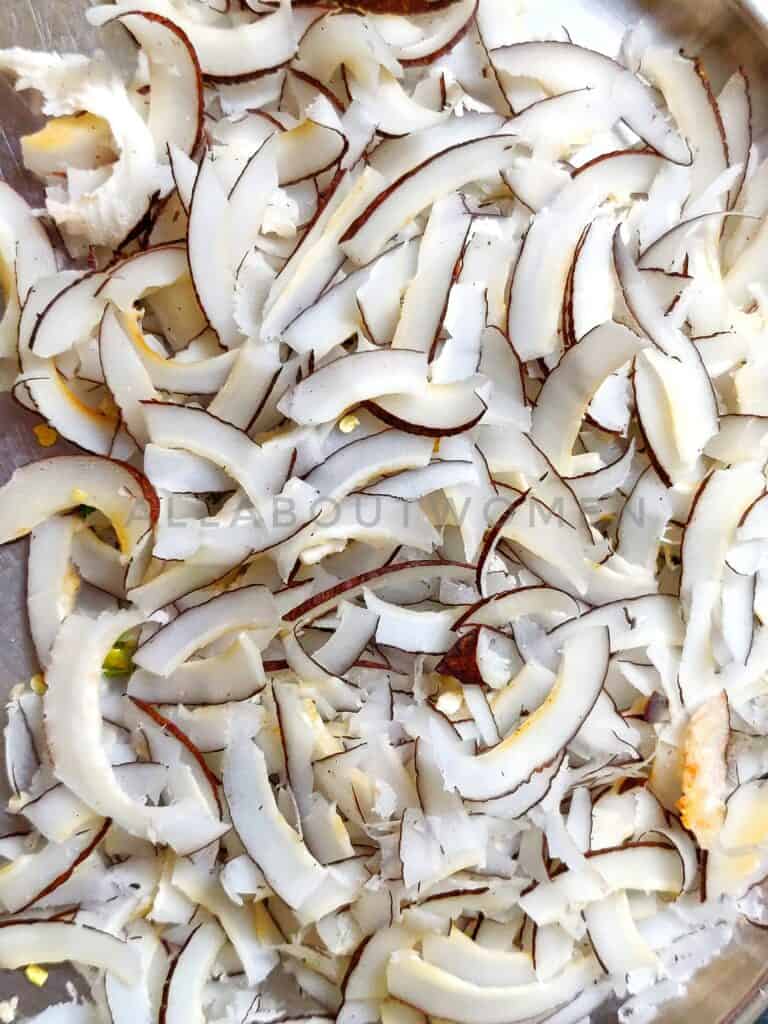
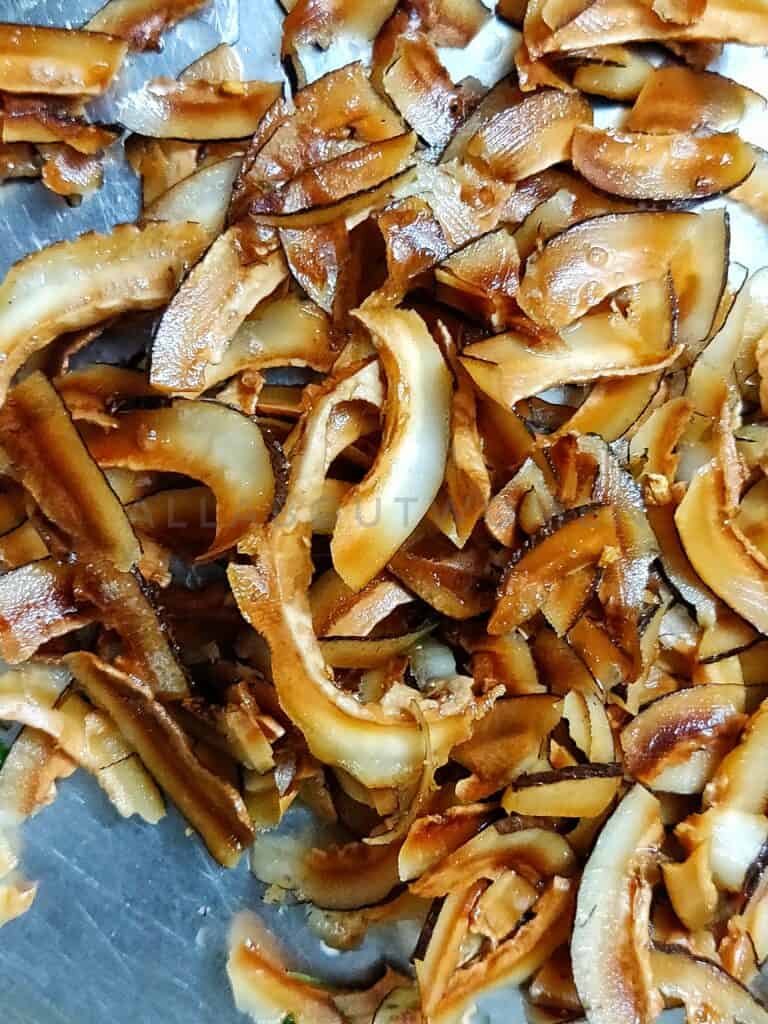
- Sliced dry coconut – 1 cup
- Finely chopped green chilli – 20
- Roughly chopped coriander leaves – 1 ½ cup
- Curry leaves – 2 cups
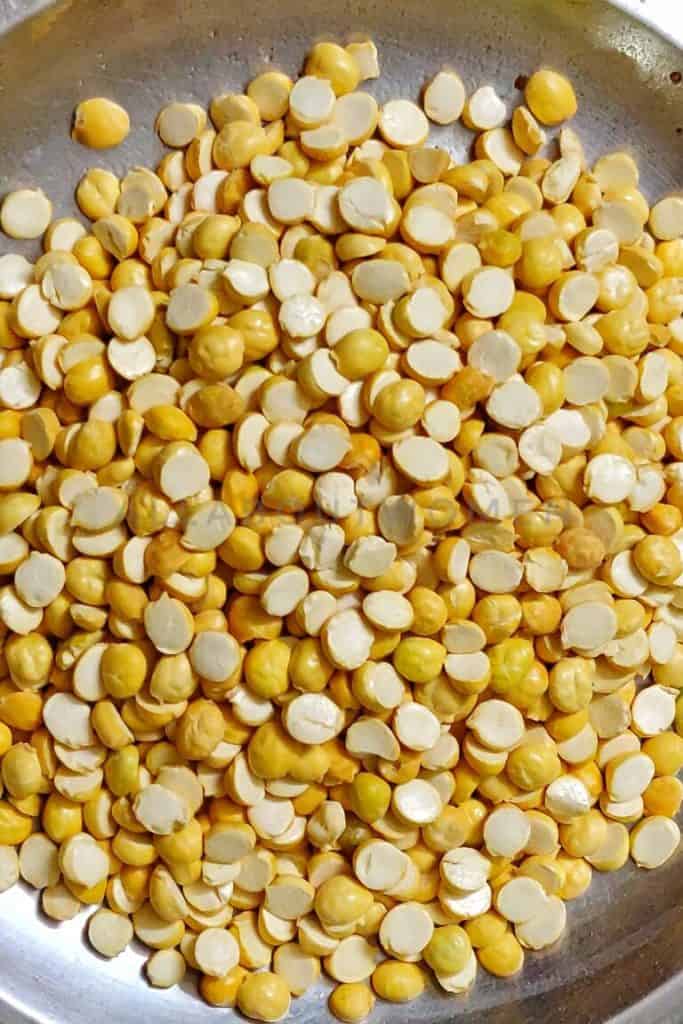
- Roasted chana dal – ½ cup
- Red chilli powder – 1 tbsp
- Turmeric powder – 1 tbsp
- Salt – to taste
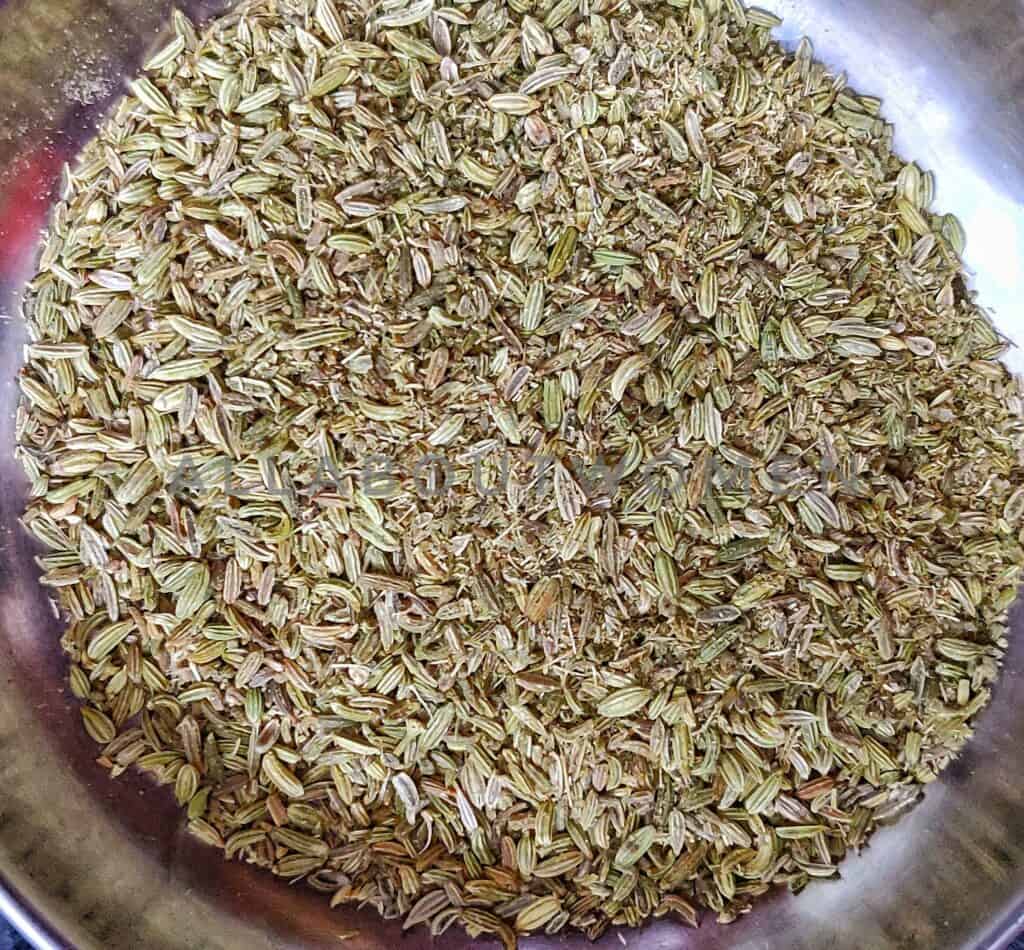
- Fennel seed – ¾ cup
- Coriander powder – 1 tbsp
- Oil – for frying
- Powdered sugar(optional) – 1 tbsp
Method:
- Keep all the ingredients ready.
- Use a large bowl with wide circumference so that the mixing of the ingredients is easy.
- First we are going to fry poha, peanuts, sliced coconut, coriander leaves, green chilli & curry leaves.
- Heat oil in a deep bottom kadhai. Use a deep frying sieve for frying the poha. Remember that the oil in the kadhai should be always filled to ¾ level.
- Once the oil is hot, reduce the flame to medium.
- Now start frying the poha. Take fistful of poha in the sieve, and dip it in the hot oil. The poha will puff up immediately. Remove the fried poha in a large bowl.
- Try to maintain the temperature of the oil. If the temperature of the oil drops down , poha will not puff properly. Add oil whenever the level goes down and heat it properly and then only start frying the poha. Do this process without any break because once the poha is fried, we will be adding all the spices immediately till the poha is hot.
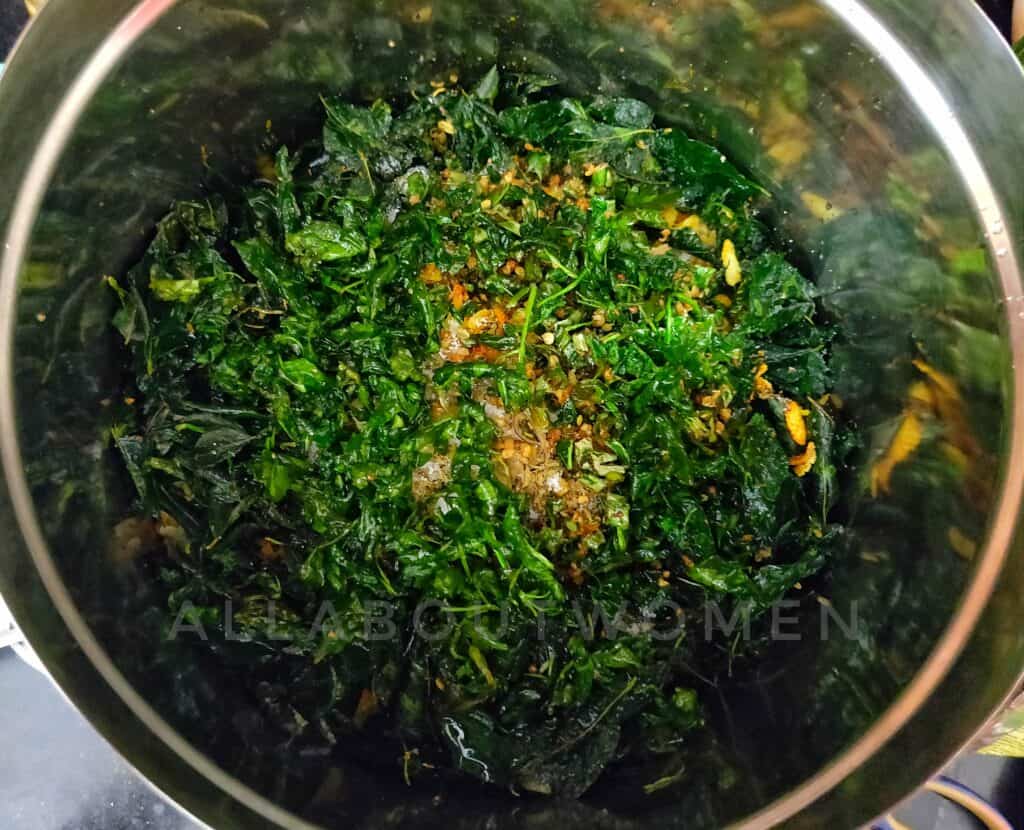
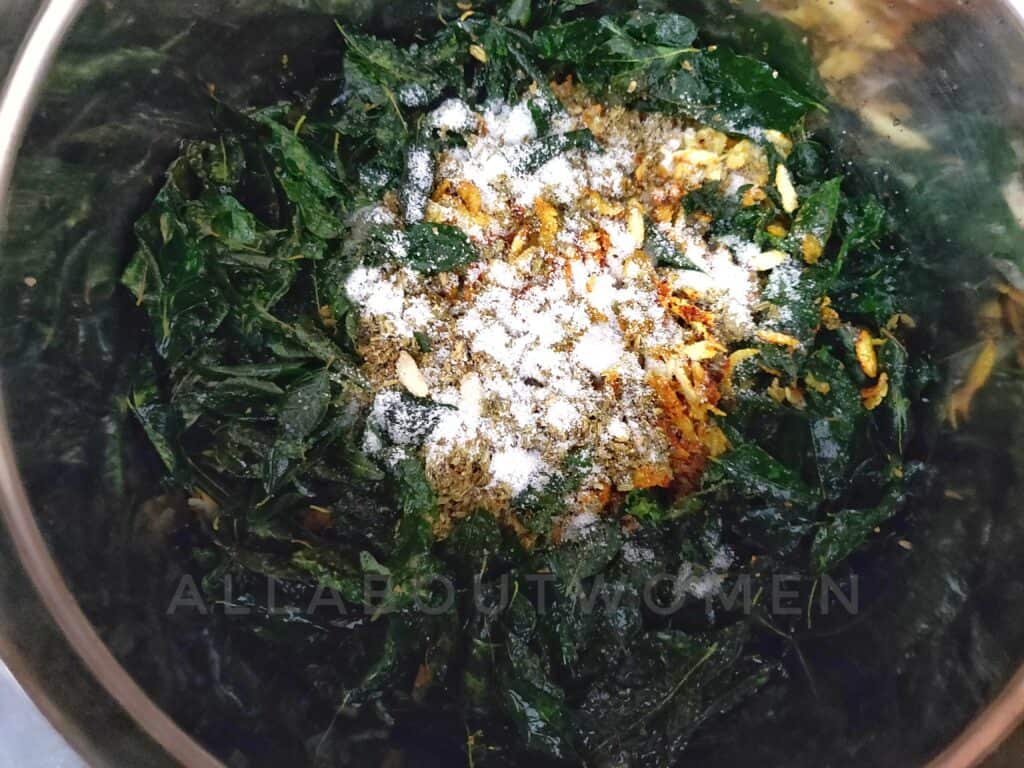
- When the poha is fried, add red chilli powder, turmeric powder and salt.
- Mix gently and quickly so that all the spices gets evenly coated over the fried poha.

- Now we are going to fry the other ingredients separately and add it to the poha.
- However we will be mixing all the ingredients at last.
- Roast the fennel seed, cool it and grind to a coarse powder. Then fry it with some oil on a tawa or in a pan.
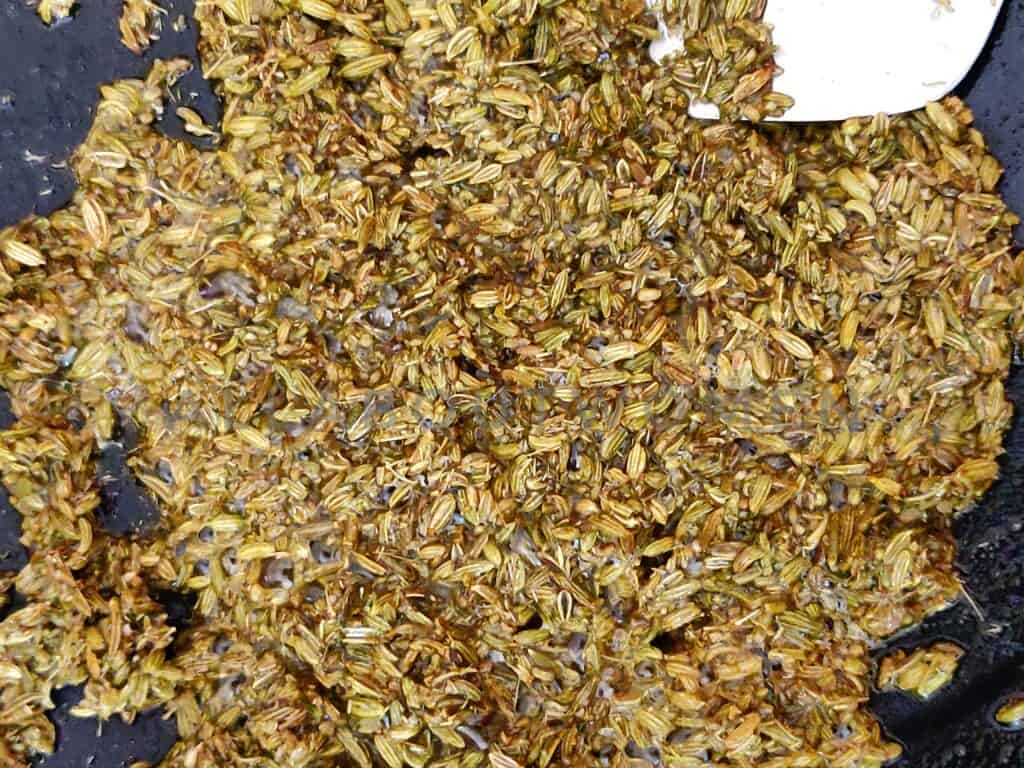
- Add the fried fennel to the poha.
- Deep fry peanuts on low flame till light pink colour. Add it immediately to the poha.
- In the same oil fry the slice coconut. The coconut should be of the same thickness for the uniform frying. It takes just few seconds to fry dry coconut. Add it to the fried poha.
- Similarly deep fry curry leaves, chopped green chilli and chopped coriander separately and add to the poha.
- Add the roasted chana dal.
- Add the powdered sugar.
- Mix all the ingredients properly.

- Let it cool to room temperature.
- Store in a clean and airtight container.
The post Poha Chiwda appeared first on SpicenSweet.
]]>The post Palak vadi/Palak recipes/Veg spinach recipes appeared first on SpicenSweet.
]]>Palak vadi is a very healthy snack recipe. This is one of the easy palak recipes to make at home for any party or pack it for kids lunch box. Palak Vadi is mainly made by steaming first and then deep frying it, making it very crispy and crunchy.

This is one of the most easy and healthy veg spinach recipes to try. Palak leaves/spinach leaves lose their crunchy texture on cooking but after frying they regain the crunchy taste.
These crunchy rolls are tempting and a very convenient snacks recipe to make in advance. The palak roll can be steamed and kept in refrigerator. Simply cut the roll into pieces and fry before serving.
The crunchy texture of the vadi is the most important feature of this snack. Just follow the tips mentioned below for the perfect crunch.
Try my other snacks recipes also
Kabuli chana kebab/chick pea Kebab
You can also follow me on Facebook Twitter Instagram Pinterest
Tips to make the Palak Vadi more crispy and tasty –

- Use besan/chickpea flour of fine texture that will make the Vadi crispier. Often besan/chickpea flour has different texture or fineness according to the different brand. Coarse besan/chickpea flour will not bind properly with the palak/spinach tending the Vadi to break. So use fine flour.
- Keep the batter thick.
- Let the batter sit for mentioned time so that the ingredients are well combined with the besan/chickpea flour and also the besan/chickpea flour gets properly combined with water.
- Another important tip is, as mentioned in the method, add the chopped palak/chopped spinach just before steaming the vadi. This is because if the batter added with palak/spinach is left for certain time, palak/spinach will release water making the batter watery and it will be very difficult to shape it into rolls.
To make crispier Vadis, palak/spinach quantity should be more or at least equal to the besan/chickpea flour.
Ingredients:
- Besan/chickpea flour – 1 cup
- Chopped Palak/chopped spinach – 2 cups
- Red chilli powder – 1 tsp
- Turmeric powder – ½ tsp
- Jeera powder – ½ tsp
- Garam Masala powder – 1 tsp
- Ajwain/carom seeds – 1 tsp
- Ginger garlic paste – 1 tsp
- Finely chopped green chilli – 1 to 2 tsp
- Salt – to taste
- Water – as required
- Oil – for frying
Method:
- Take besan/chickpea flour in a bowl.
- Add red chilli powder, turmeric powder, jeera powder, garam masala powder, salt to taste, ajwain/carom seeds, ginger garlic paste, chopped green chilli.

- Mix all the ingredients with a fork or spatula.
- Now make a thick batter by adding water.

- Keep this batter aside for 10 mins.
- In the meantime prepare the steamer for steaming the Vadi. Grease the plate with oil.
- Add chopped palak/spinach to the batter and mix to combine properly so that the batter is evenly coated with the besan.
- Immediately shape the mixture into a cylindrical roll.

- Place this roll on the greased plate. Similarly make all the rolls and place on the steaming plate.

- Place the plate on steamer and cover with lid.
- Steam the palak vadi for 15 minutes.
- After 15 minutes remove the plate and let the Vadi cool down to room temperature. The hot piping steamed Palak Vadi also taste great without frying. You can enjoyed it as it is or fry the Vadis for crispy and more delicious taste.
- Once the roll is cooled down, cut it into Vadis i.e. circle.

- Heat oil in a kadhai/pan.
- Deep fry the Vadis till golden brown.

- Serve when hot with tomato sauce or green chutney.
The post Palak vadi/Palak recipes/Veg spinach recipes appeared first on SpicenSweet.
]]>The post Vada Pav appeared first on SpicenSweet.
]]>
How to make popular street food Vada Pav
Follow me on Facebook, Twitter, Instagram, Pinterest.
Vada pav is the most easy & tasty Indian street food to make at home. The vada is made up of potato sabzi coated with besan batter and served with soft and fluffy pav. The pav is a salty bread which is different from other bread as it is very light and small in size compared to other bread or pav. It is again easily available in the market. The only thing one has to prepare is the potato/aloo sabzi and the batter for the outer covering.
Try my other snacks recipes also
Kabuli chana kebab/chick pea Kebab,
Ingredients:
For the sabzi
- Potato/Aloo – 500 gm
- Garlic – 5 to 6 cloves
- Ginger – 1”
- Coriander seeds – 1 tsp
- Cumin/jeera – 1 tsp
- Finely chopped green chilli – 5 to 6
- Curry leaves – 8 to 10
- Turmeric powder – 1 tsp
- Salt – to taste
- Oil – 1 tbsp + for frying(as required)
- Chopped coriander leaves – ¼ cup
For the batter
- Besan/chana dal flour – 1 cup
- Salt – to taste
- Turmeric powder – ½ tsp
- Water – as required
- Baking soda – a pinch
Method:
Preparing the sabzi
- Boil the potatoes.
- Peel and chop the potatoes.
- In a mortar add garlic, ginger, coriander seeds, and cumin/jeera. Make a rough paste with the pestle.
- Heat oil in a kadhai.
- Add curry leaves.
- Then add ginger garlic paste and green chilli.
- Cook for few a minutes.
- Add turmeric powder and mix.
- Now add chopped boiled potatoes and mix.
- Season with salt and mix properly.
- Cover and cook for 2 mins.
- Add coriander leaves and mix it.
- Remove the sabzi on a plate and let it cool down to room temperature.
- Roll the sabzi into balls.

Preparing the batter
- In a bowl take besan.
- Make a paste with water. The paste should be a little bit thicker inconsistency.
- Add salt, turmeric powder, and baking soda. Mix it properly.
Making the Vada
- Heat oil in a deep bottom kadhai.
- Dip the ball into the batter and roll it so that the batter is evenly coated over the ball.
- Fry this ball till golden brown color on medium flame.
- In the similar way fry all the balls.

- To add more spice and taste fry some slit green chilli. It is a good combination with the Vada Pav.
- Open the pav/bread from the center and place the Vada.
- Serve hot with fried green chilli.

The post Vada Pav appeared first on SpicenSweet.
]]>The post Moong Dal Appe recipe appeared first on SpicenSweet.
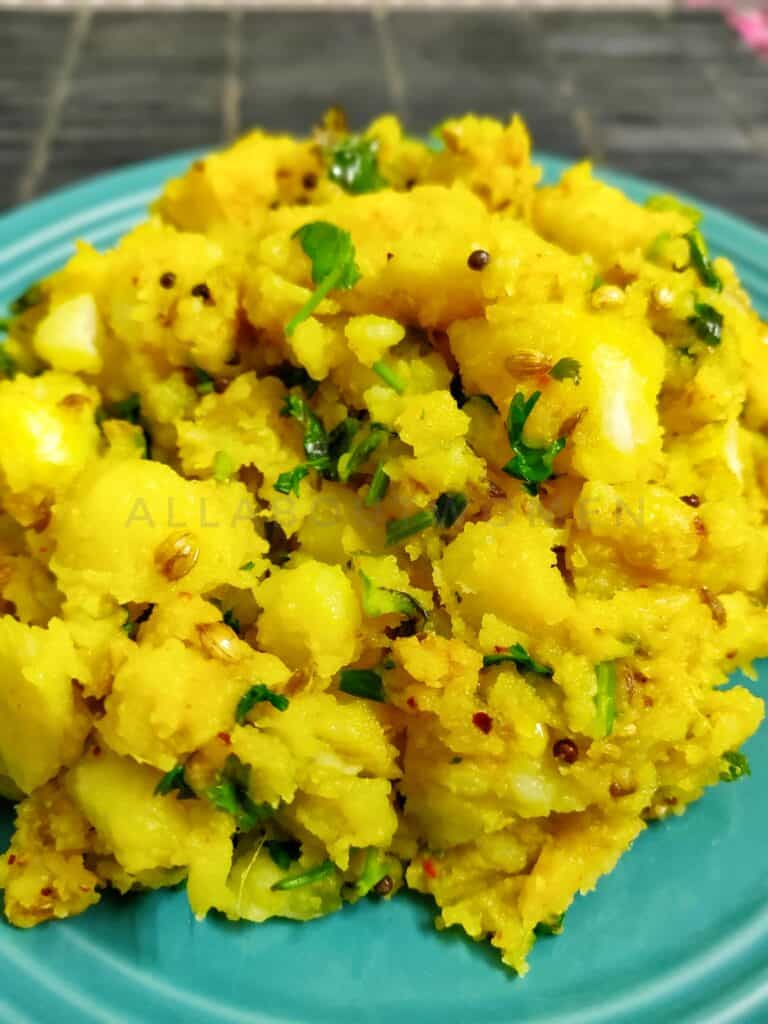
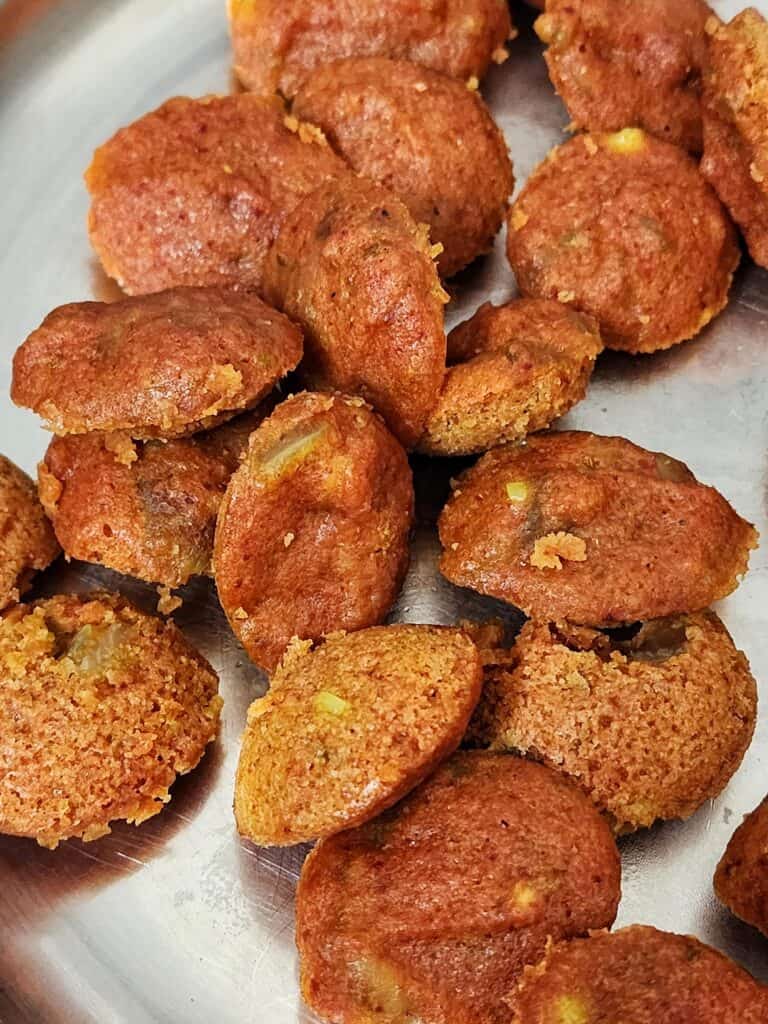
]]>Whether it is an evening snack or easy and light dinner, Moong Dal Appe is one of the best recipe. It is tasty, healthy and easy to make. Moreover moong dal is very light and easy to digest so makes a perfect food for a light dinner.
Moong dal is very easy to digest and full of nutrients. It is a very popular and widely used lentil/dal. Moong dal is often used to make Khichdi along with rice.
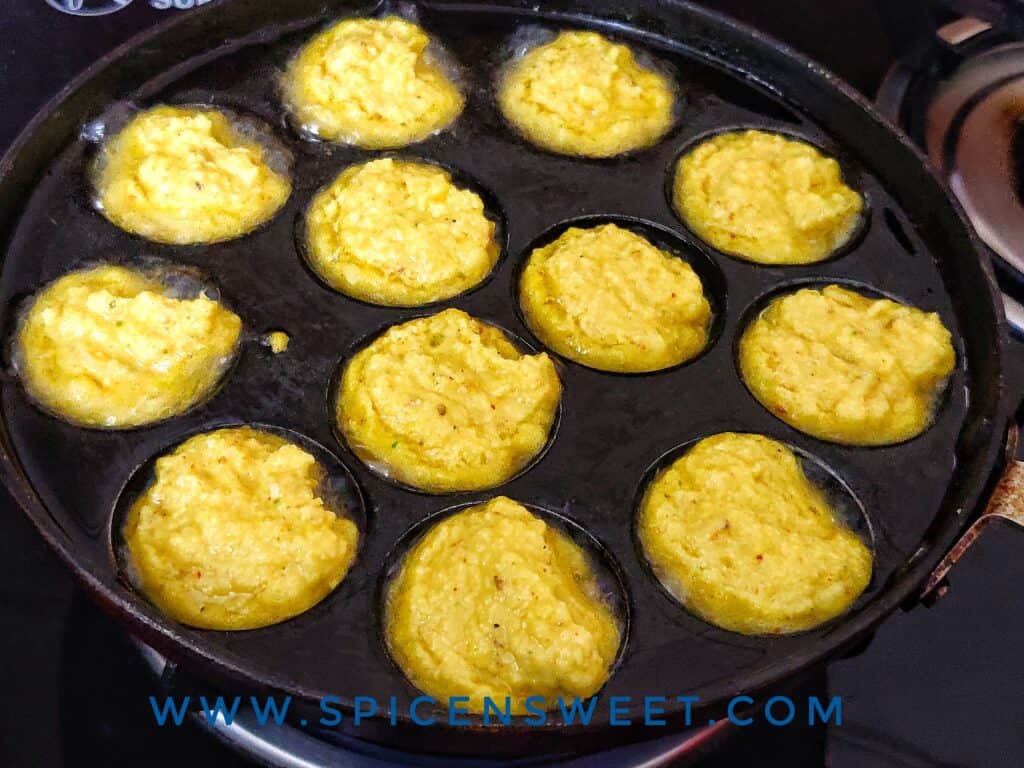
Appe is a type of snack/fritter in which a special utensil is used called Appe patra. It is easily available in the market. Using very less oil we can make many varieties of Appe in Appe patra.
Try my other snacks recipes also
Mozzarella cheese Fingers
Crispy potato bites
Vada Pav Kabuli chana kebab/chick pea Kebab
Cheese ball
Ingredients:
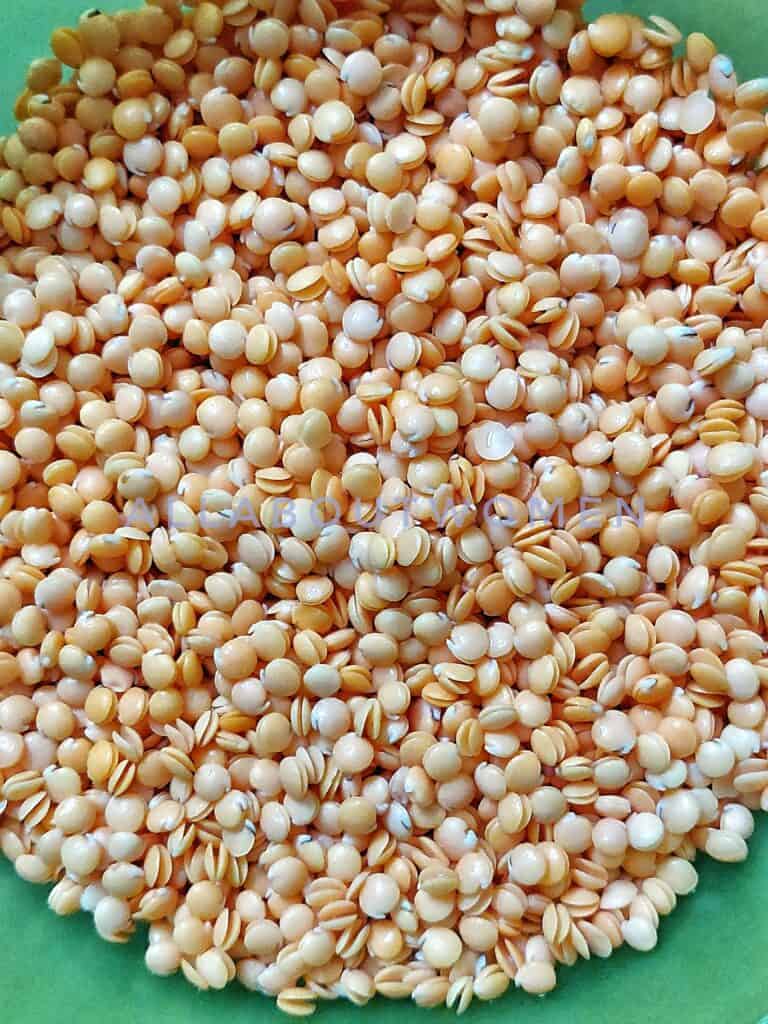
- Yellow moong dal – 2 cups
- Curd – ¼ to ½ cup
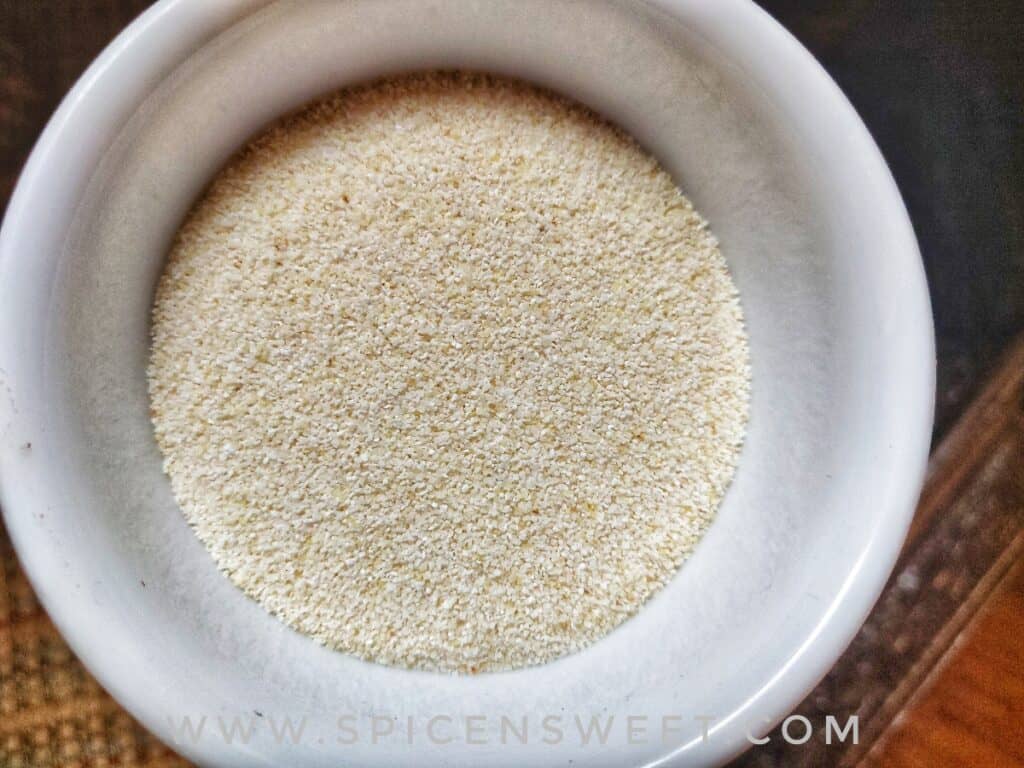
- Semolina/Suji – ½ cup
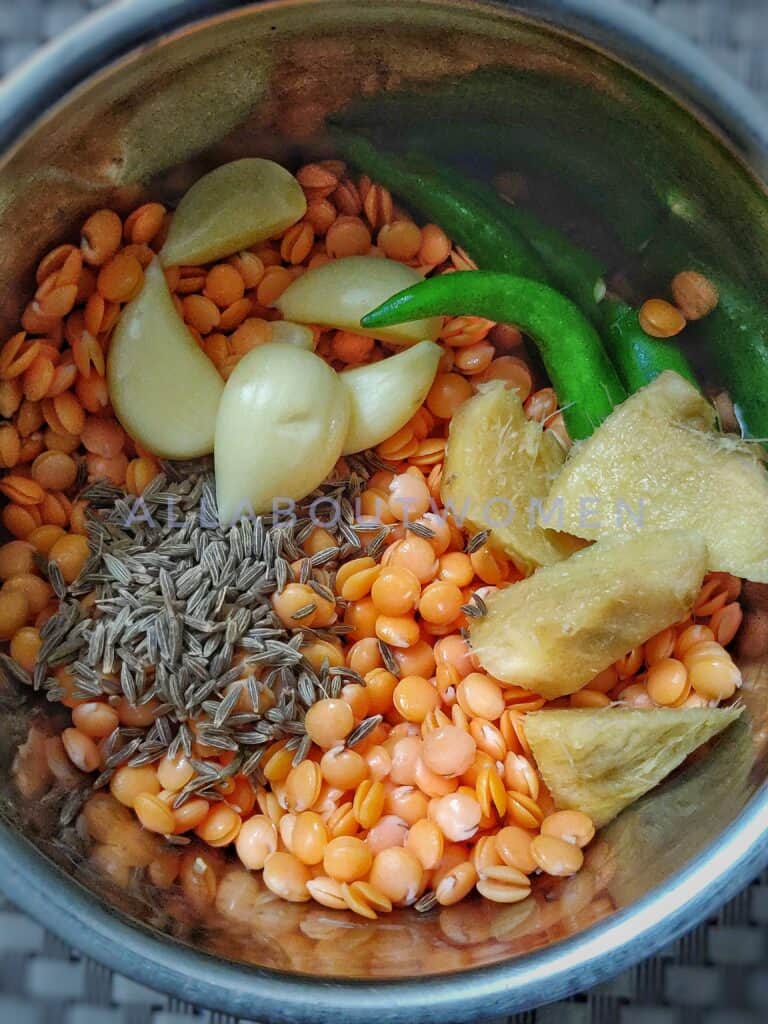
- Green chilli – 5 to 6 nos
- Cumin seeds/jeera – 2 tsp
- Garlic – 2 cloves
- Ginger – 1 inch
- Mint leaves/ pudina – ¼ cup
- Salt – to taste
- Sodium bicarbonate – ½ tsp
- Oil – as required
You can also follow me on Facebook Twitter Instagram Pinterest
Method:
- Soak the moong dal for 3 to 4 hours in warm water.
- Drain the water from the dal.
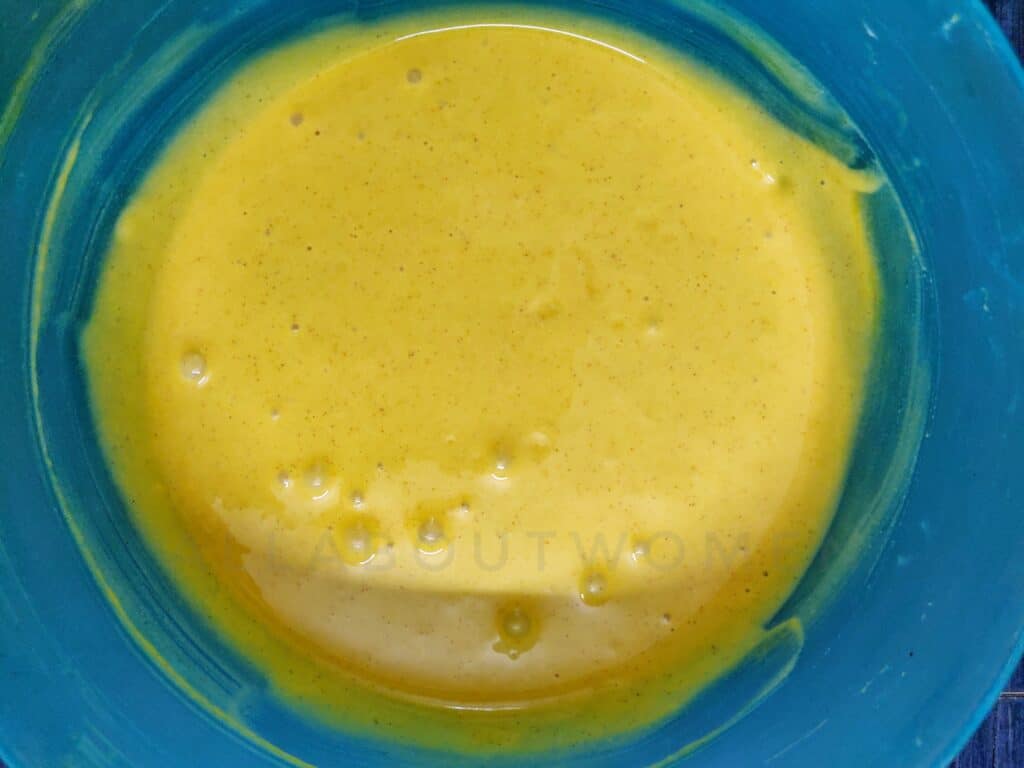
- Grind into coarse paste, moong dal along with all the dry ingredients except salt.
- In a large bowl mix the moong dal paste with curd.
- To this mixture add Suji/semolina and mix.
- Add chopped mint/pudina leaves to the paste. Add salt to taste and mix.
- Cover and leave the batter for ½ hour. During this time the Suji/semolina will be soaked properly and absorbs moisture from the batter. This will also help Suji/ semolina to cook properly.
- Now heat the appe pan.
- Grease the pan/appe patra generously with oil. During the first batch of appe more oil will be required for greasing. After one batch of appe little oil will be enough. One good thing about this appe is, it doesn’t absorb much oil during cooking.
- After ½ hour add sodium bicarbonate and mix properly. The batter will become light and fluffy.
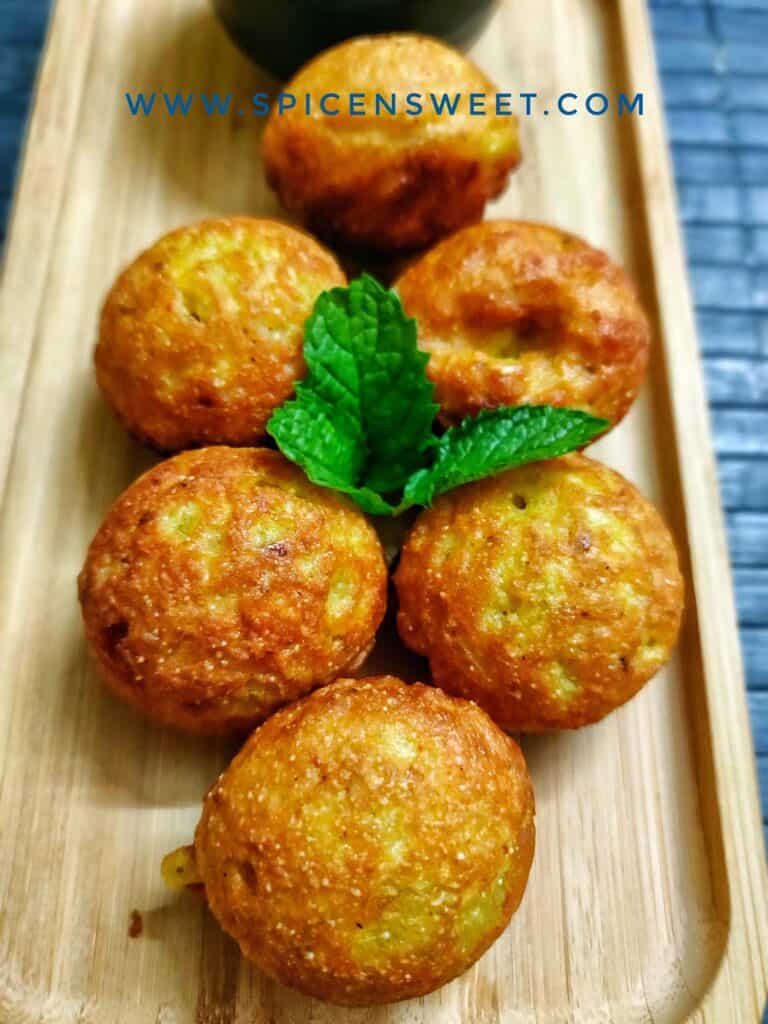
- Now pour the appe batter into the pan using a spoon.
- Now let the appe cook till it leaves the corner of the pan/appe patra or change color. The appe will also rise and become fluffy.
- Grease with some oil if the side seams dry.
- Turn the side of the appe and cook till it turns crispy & golden brown.
- Serve hot with tomato sauce or mint/pudina chutney.
The post Moong Dal Appe recipe appeared first on SpicenSweet.
]]>The post Eggless Donut recipe/ Easy way to make Eggless Donut at home appeared first on SpicenSweet.
]]>With this Donut recipe it is super easy to make donuts at home without adding egg. Donut is a sweet snack recipe prepared with a yeast base dough by frying. These soft fluffy donuts are slightly sweet in taste and are flavoured later with varieties of glaze. The most popular flavour is chocolate glazed donut. The donuts can also be simply sprinkled with powdered sugar, these egg free donut too tastes awesome.

If you think Eggless donut recipe is a hard to try at home then think again and try this simple eggless donut recipe. Donuts are very simple to make at home taking care of very simple basic things mentioned below. This is the best homemade glazed donut recipe for anyone who wants to try making eggless donuts.
I have also showed how to make simple donut glaze to make them more delicious. So with this donut glaze recipe you can easily make different flavours of donuts at home.
You can also follow me on Facebook Twitter Instagram Pinterest
Things to remember before making Donut recipe
See that the yeast you use is active. Whenever you use a new pack of yeast check it by proofing. During this process the yeast eats on sugar and releases carbon dioxide making the liquid appears bubbly. This shows that the yeast is active and can be used for making the bread. (For proofing, in a bowl add 1/2 cup warm water. To this add 1 tsp of sugar and 1 tsp of dry active yeast. Give a stir. Cover and leave the mixture for 5 to 10 minutes. The mixture will become bubbly and form foam. This mixture is ready to use for making your bread.
The measurements should be correct especially for the flour and yeast. The water quantity mentioned in the recipe is perfect for this recipe but still to avoid any error remove 1 to 2 tbsp of water from the mentioned quantity and add it if required while kneading the dough. The consistency of the dough should not be too tight nor should it be too watery. It should be enough so that we can handle the dough.
Keep the dough for rising till it doubles in size. The time is always mentioned in the recipe but it always differs from place to place because of the weather of a particular place. Ideally a warm and damp place is suitable for the dough to rise quickly. So go according to the weather condition at your place, important thing to notice is that the dough should be double in size. Also don’t check the dough frequently.
Also try more of my Eggless baking recipes
Eggless Red velvet cake using condensed milk
So lets start with the recipe.
Ingredients:
For preparing the Dough
- Maida/refined flour – 2 cups
- Instant active dry yeast – 2 tsp
- Warm milk – 1 cup
- Sugar – 1 tsp
- Butter – 2 tbsp
- Salt – 1 tsp
For the glaze/ topping
- Dark chocolate – 1 cup
- Powdered sugar – ½ cup
- Nutella – ½ cup
- Choco chips – ½ cup
Directions:
- In a bowl take maida/refined flour.
- Add sugar, salt, active dry yeast, warm milk and melted butter.

- Mix roughly with a wooden spatula.

- When all the ingredients are combined together, take the dough on a flat surface dusted with flour.

- Knead the dough for 10 to 15 minutes.

- Place the dough in a bowl greased with some oil.

- Cover the dough and keep it in a damp and warm place for 2 hours or till the dough rises to double its size.
- After 2 hours take the dough on a flat surface and knead gently.
- Divide the dough into two parts.
- Roll the dough with 1 cm thickness.
- Cut the dough with donut cutter.

- Keep the remaining dough.
- Make the remaining donuts in the same way.

- After making all the donuts, keep them covered for another 1 hour.
- The donuts will rise double its size.
- Heat oil in a kadhai or pan.
- Once the oil is hot, fry the donuts on medium flame till golden brown.
![]()
- Let the donut cool down to room temperature.
- For making chocolate donuts, melt the dark chocolate in microwave. Dip one side of the donut in the melted chocolate. Top with some Choco chips over the melted chocolate and let it cool down. Or sprinkle powdered sugar and spread melted chocolate over the donuts with a spoon.


- For sweetened donuts sift powdered sugar with a sieve over the donuts.

- Not only chocolate you can also try with Nutella. Dip the donuts in Nutella and top with some Choco chips.

- Enjoy these different flavours of donuts with tea, coffee or hot chocolate.
The post Eggless Donut recipe/ Easy way to make Eggless Donut at home appeared first on SpicenSweet.
]]>The post Mozzarella Cheese Fingers recipe/How to make Crispy mozzarella Cheese Fingers appeared first on SpicenSweet.
]]>
How to make Crispy Mozzarella Cheese Fingers recipe
Though this snack recipe is very commonly made but it is very important that the fingers should have the exact crispy layer and the cheese has to be melted at the right time.
Some common things which should be taken care of for a perfect taste of “Mozzarella Cheese Finger recipe” . You will find it lengthy but these are very basic and useful tips which we often neglect. The tips can be helpful in daily cooking also. So don’t skip it.
- Boiled potato is one of the most important ingredient of this recipe. And not for this recipe only, this tip will help you for other snack recipes also, where boiled potato is used.
- First of all choose the right quality and also variety if possible. By right quality I mean the potato should not be old or soft. If the potato is soft that means it is quiet old with tubers grown over it. The old potato not only affects the taste but also badly affects the texture, which is required for a perfect recipe. So always choose fresh and firm potatoes.
- I also mentioned about variety of potato, so preferably use Sugar free potatoes. It not only enhance the taste but also improves the texture, it is easily available in the market. Big branded companies producing potato chips/wafers use sugar free potatoes only for their products.
- The potatoes should not be overcooked/boiled. Overcooking absorbs more moisture and destroys the texture. Because of this the fingers will be very soft and not withstand the shape. So boiled the potatoes for required time only.
- Second ingredient which is equally important is the cheese, use mozzarella cheese avoid using processed cheese. Mozzarella cheese has perfect balance of salt and it melts faster than processed cheese. The main reason for this is the moisture content, mozzarella cheese is soft and creamy and has high moisture content which lacks in processed cheese. Processed cheese is harder and takes time to melt. If you have tried processed cheese for making finger then you must have experienced that the cheese either has not melted or it becomes chewy. So use mozzarella cheese for Cheese fingers.
- One step in the recipe is coating the fingers with the batter, which I will be explaining in the description, the batter should not be very thick. Thick batter will prevent the heat reaching inside for melting the cheese. Thin batter will not stick to the fingers and the outside layer not be crispy. So the batter should be of right consistency so that it gets nicely coated on the fingers.
- Fry the fingers on medium flame till the outside layer becomes golden brown and simultaneously the cheese gets time and heat to melt down.
- Last but not the least, don’t forget to serve the mozzarella Cheese Fingers hot. If the Mozzarella Cheese Fingers gets cold you will miss the melted cheese…So enjoy the Cheese Fingers when they are hot!!! Take care not to burn your tongue….
Try other snacks recipes also
Kabuli chana kebab/chick pea Kebab
So finally we will move on to the recipe.
Ingredients:
- Boiled potato – 2 large
- Chopped green chilli – 2
- Red chilli flakes – 1 tsp
- Chat masala – ½ to 1 tsp
- Chopped onion – 1 small
- Grated cheese(optional) – 2 tbsp
- Salt – to taste
- Oil – for frying
- Corn flour – ½ cup
- Maida/refined flour – 1 cup
- Breadcrumb – 1 cup
- Mozzarella cheese sticks – 1 cup
Method:
- In a bowl mash the boiled potatoes, leaving some very small chunks.
- Mix in green chilli, chilli flakes, chat masala, onion and salt. If you don’t have red flakes use red chilli powder according to your taste. Chilli flakes looks good and taste better.
- Mix grated mozzarella cheese, which is optional. Readymade small mozzarella cheese chunks can also be added. If you are adding this mozzarella cheese then while frying some cheese will melt but don’t worry the fingers will come out good.
- Mix all the ingredients and gather together to make a ball.


- Divide the ball into 10 to 12 equal parts.
- Make a cavity in each and stuff mozzarella stick in it. Cover the ball and roll or shape into fingers. Keep all the fingers ready.

- Make a batter of Cornflour and maida/refined flour. The quantity mentioned in the ingredients is 1:2 respectively. Add some water initially and mix. This will prevent forming lumps in the batter. Once the flour is mixed, add sufficient amount of water to make a thick slurry.
- Add salt to taste and some chilli flakes. Chilli flakes will give a nice look and color to the fingers.
- Take some breadcrumbs in a plate.
- Now our batter, fingers and breadcrumbs are ready. Place them together. The next step is a continuous step using all of them.
- Heat oil in a kadhai/ pan.
- Now the golden rule for handling the mess with the batter and breadcrumb is dip the cheese fingers in the batter with right hand and coat the breadcrumb over the cheese fingers with left hand. Coat all the cheese fingers with the batter and breadcrumbs.

- Now the oil is ready for frying. Fry the fingers on medium flame till golden brown. Initially while adding the cheese fingers keep the flame on high for few seconds then turn on medium.

- Serve the yummy cheese fingers when hot with tomato sauce or mint chutney.
The post Mozzarella Cheese Fingers recipe/How to make Crispy mozzarella Cheese Fingers appeared first on SpicenSweet.
]]>The post Chilli Garlic Potato Bites recipe appeared first on SpicenSweet.
]]>This Chilli garlic potato bites is a super tasty and crunchy snack recipe with a different variation. The potato bites are healthier as I have not used any corn flour or maida/refined flour. So that makes it a more healthy to eat. The crispiness of potato bites is with a secret ingredient…yes it is other than breadcrumb or cornflakes.

Looking for a low calorie veg snacks for party or an easy evening snacks for hungry food, this potato bites will surely fulfil that need. As these bites are super easy and heathy, it can be a great choice for vegetarian appetizers for any party.
Potato bites is one among the most popular potato recipes. Any flavour goes well with the potatoes. But the best flavour is chilli potato and garlic potato. And when both the flavours are merged together then the taste goes on higher level. No wonder why this Chilli garlic potato bites are so scrumptious and liked by everyone.
Happy snacks are always welcomed and especially when it comes to children then we always look for a healthy recipe. Nowadays we are more health conscious for ourselves and kids too, avoiding more refined food/ ingredients becomes the basic criteria for any recipe. Of course we cannot avoid it completely but the usage can be reduced.
So moving forward towards the recipe I could say that you all are going to like this recipe of Chilli garlic potato Bites. The recipe takes very less time to prepare and make it.
You can also try my other easy snacks recipe like
Ingredients:
- Boiled potato/aloo – 1 cup
- Finely chopped onion – ½ cup
- Chopped garlic – 1 tsp
- Chilli flakes – 1tsp
- Chopped green chilli – 1
- Chat masala – 1 tsp
- Rice flour – 1 cup
- Water – 1 cup
- Oil – to fry
- Salt – to taste
You can also follow me on Facebook, Twitter, Instagram, Pinterest.
Directions:
- In a pan bring water to boil.
- In the boiling water add 1 tsp of oil, chopped garlic, chilli flakes and salt to taste.
- Let the water boil for few seconds.
- Then add rice flour and quickly mix with hand whisker or spatula to avoid any lumps. I have used homemade rice flour, you can use the rice flour easily available from the market. For making rice flour at home simply wipe the rice using clean muslin cloth or any cotton cloth. Grind the rice into flour. Sift the flour to remove any large particles. Generally rice flour is made by soaking or washing the rice first and then drying it in shade. But without washing the rice, the flour gives more crispy texture.
- Once the flour comes together, remove the pan from the gas stove. We are not going to cook the flour much. Cooking rice flour will give more crispiness to the bites and also it acts as a binding ingredient like maida/refined flour.
- Let the cooked rice flour cool down to room temperature. To save the time take out the dough in a plate and spread it.
- Now once the dough is cooled down add the other ingredients i.e. boiled potato, chopped onion, chopped green chilli, chat masala and salt to taste.
![]()

- Mix all the ingredients thoroughly.

- Take small portions and shape into rolls. The rolls will break somewhat but don’t worry knead it gently and roll it.
- Cut the rolls into equal parts each 1 cm of thickness.

- Similarly make potato bites of the remaining dough.
- Heat oil in a pan.
- Dip fry the potato bites in batches and your teatime snack is ready to serve.

- Serve crispy chilli garlic potato bites with tomato sauce or pudina chutney.
The post Chilli Garlic Potato Bites recipe appeared first on SpicenSweet.
]]>The post Dhokla/Instant Dhokla/Khamang Dhokla appeared first on SpicenSweet.
]]>

How to make soft and spongy Instant Dhokla recipe
Instant Dhokla is quiet favorite one. There are various recipes to make Dhokla, using chana dal flour, salt and citric acid called “Super Instant Dhokla “or” Zatpat Dhokla”, as it is made with minimum ingredients and less time. My recipe of instant Dhokla is a mixture of rice, chana dal and urad dal along with other spices. This flour can be made at a time and stored for 6-8 months. Whenever you what to make Dhokla, required quantity of flour is mixed with water and steam it…..that’s it…very simple and delicious.
Try my other snacks recipes also
Kabuli chana kebab/chick pea Kebab
Ingredients:
For making the Flour –
- Rice – 1 kg
- Chana dal – 750 gm
- Urad dal – 250 gm
- Sugar – 150 gm
- Citric acid – 60 gm
- Baking soda – 50 gm
- Salt – 75 gm
For making the Paste –
- Green chilli – 2 to 4
- Garlic – 2 clove
- Ginger ½ inch
- Coriander leaves – ¼ cup
- Cumin/jeera – 1 tsp
For the tadka –
- Curry leaves – 8 to 10
- Mustard seeds – 1 tsp
- Oil – 2 tbsp
Follow me on Facebook, Twitter, Instagram, Pinterest.
Method:
- Grind together rice, chana dal and urad dal into a coarse flour(like rava/suji).
- Grind sugar, salt, citric acid separately into a fine powder.
- Mix the flour along with the other grinded powder thoroughly.
- Store in an air tight container.
- For making Dhokla, take 1 cup of this flour and make a batter with water. The consistency used be like idli batter, not too thin not too thick.
- Make a paste of green chilli, garlic, ginger, jeera/cumin and coriander leaves. Add this paste to the batter and mix well.
- Grease the Dhokla plates with oil. Pour the batter keeping some space empty for the Dhokla to rise.
- Steam for 10 to 15 minutes.
- Take out the plates from the steamer.
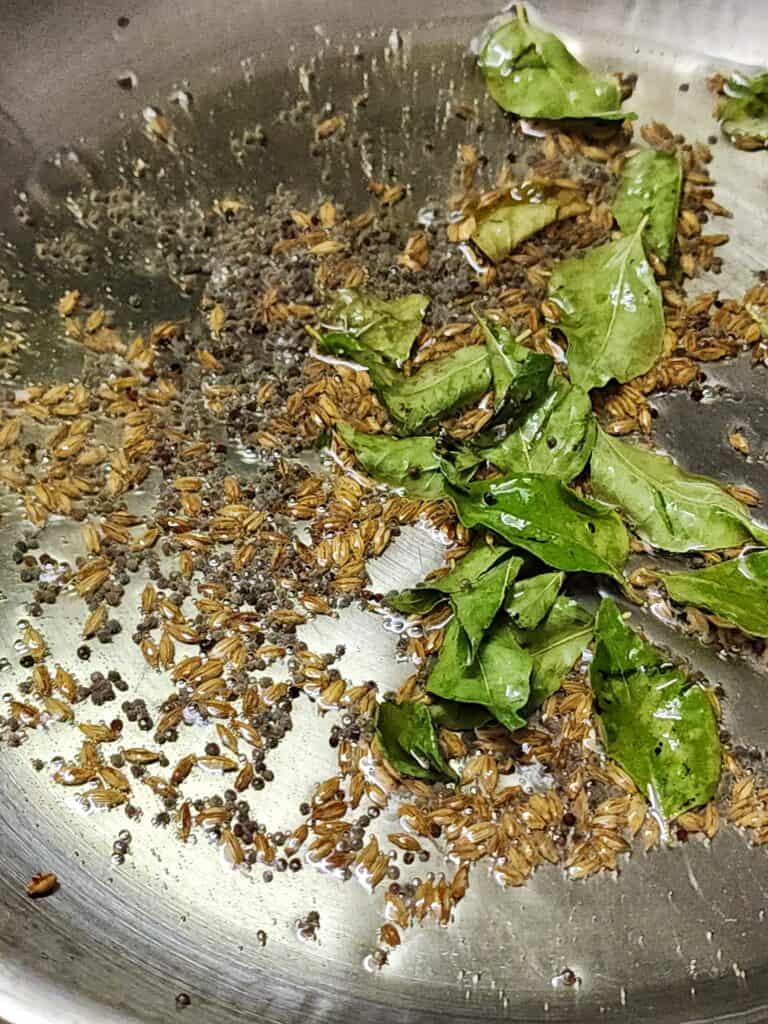
- For making tadka, heat 2 tbsp oil in a pan. Add curry leaves and mustard seeds. Pour it over the Dhokla.
- Serve hot.
The post Dhokla/Instant Dhokla/Khamang Dhokla appeared first on SpicenSweet.
]]>The post Instant Masoor Dal/Lentil Idli appeared first on SpicenSweet.
]]>How to make Instant Masoor Dal idli /red lentil idli
Instant Masoor Dal/Red Lentil Idli is a quick and healthy recipe for all. A snack, for breakfast or pack lunch for the kids eat it as you wish. Masoor dal/red lentil is easy to digest and full of nutrients. Not only dal many other recipes can be made from it. Try my previous recipe Masala Masoor Rice a different version of rice…yummy and tasty.

Masoor dal/red lentil is very healthy and good for digestion. This recipe of idli I learned from one of my friend who use to often make it for her son. So I too tried and it came out very tasty. Since it can be made easily and quickly I found this recipe will be good for kids.
Should we add suji for making Masoor dal idli?
There is no need to add suji/rava to this recipe.Like the other instant recipes for idlis or appe suji/rava is a must ingredient for making the dish soft, crispy and fluffy. But believe me this Instant Masoor dal idli recipe doesn’t require help of suji/rava. Masoor dal itself is so full of fibre that it get good texture on cooking and the crispiness from the shallow frying process. So the idlis are very fluffy and soft without any other ingredients.
Try some of my other snacks recipes also
Kabuli chana kebab/chick pea Kebab
Ingredients:
- Masoor dal/Lentil/red lentil (without skin) – 1 cup
- Garlic – 3 to 4 cloves
- Ginger – 1 inch
- Cumin/ jeera – 1 tsp
- Green chilli – 1
- Chopped onion – 1
- Curry leaves – 10 to 12
- Turmeric powder – 1 tsp
- Red chilli powder – 1 tsp
- Garam masala powder/ chat masala powder – ½ tsp
- Salt – to taste
- Oil – 1 tsp
- Baking soda – ½ tsp
You can also follow me on Facebook Twitter Instagram Pinterest
Method:
- Wash and soak the dal/red lentil in water for 1 hr.
- Remove the water.
- Grind masoor dal/red lentil into paste with minimum water along with ginger, garlic, green chilli and cumin/jeera.
- To this paste add chopped onion, turmeric powder, red chilli powder, garam masala or chat masala powder and salt to taste.
- Mix properly.
- Keep it aside for 5 mins.

- Add baking soda and mix. Now remember add baking soda to that much batter which you are going to steam. Like if the idli maker has the capacity of half the batter, divide the batter and baking soda in half the quantity and mix the soda to the remaining batter when it’s time to steam the idli.
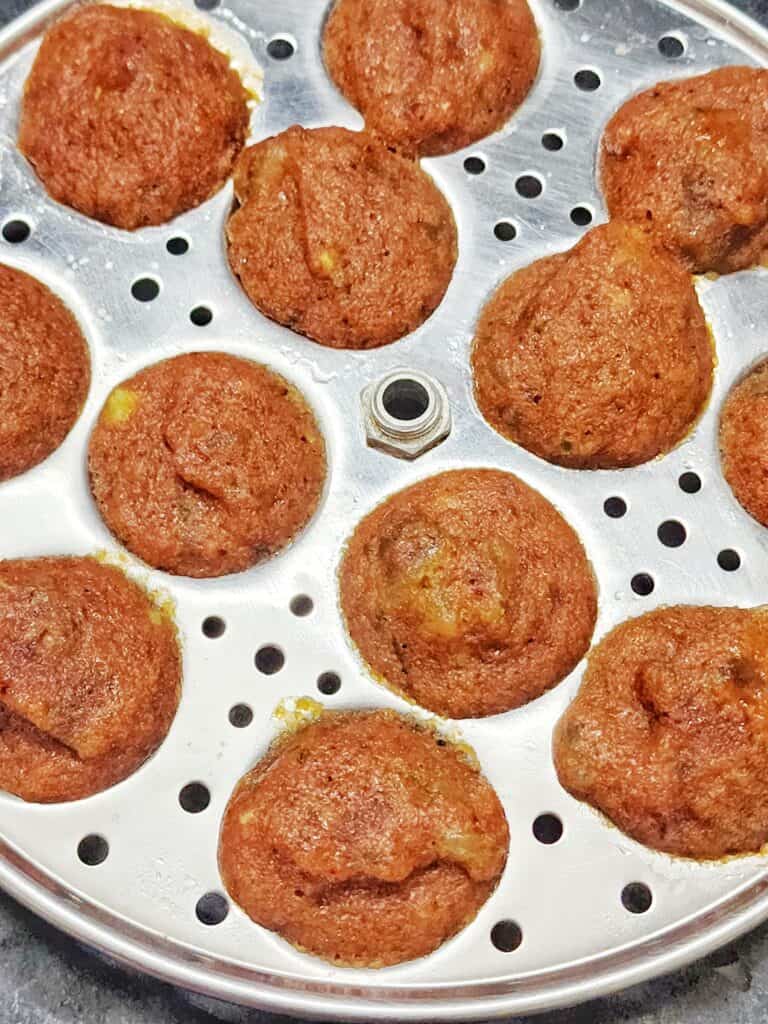
- After mixing the soda immediately fill the idli mould with the batter. Add small quantity to get mini idlis as we are going to stir fry it.

- Steam the idlis for 15 minutes.
- Remove the idlis and prepare the second batch.
- The idlis will be somewhat red in color but don’t worry that is because of baking soda we have added.
- Once all idlis are done, heat oil in a pan.
- Add cumin, chopped green chilli and curry leaves.
- Then add turmeric powder to give a nice color.
- Add the steam idlis and stir fry for 10 minutes.

- Serve Masoor dal idli/red lentil idli hot with tomato sauce or green chutney.
The post Instant Masoor Dal/Lentil Idli appeared first on SpicenSweet.
]]>The post Chilli Mushroom Recipe appeared first on SpicenSweet.
]]>

How to make Chilli Mushroom Recipe
Growing children has a good metabolism because of which the food is digested quickly compared to us. Believe me it is not only tasty but healthy and quick to make. I tried to add many vegetables which made it healthy and children can eat without any fuss. I don’t have to end up giving them ready made food. So let see how to make it.
Try some of my other snacks recipes also
Kabuli chana kebab/chick pea Kebab
Ingredients:
- Mushroom – 200 gm
- Diced green capsicum – ½ cup
- Chopped red capsicum – ½ cup
- Chopped yellow capsicum – ½ cup
- Diced onion – ½ cup
- Chopped Green chilli – 1 to 2
- Chopped garlic – 4 cloves
- Soya sauce – 2 tsp
- Chilli sauce – 2 tsp
- Salt – to taste
- Black pepper – to taste
- Corn flour – 1 tbsp
- Oil – as required
- Chopped spring onion – ½ cup

Method:
- Wash the mushroom properly to remove any soil.
- Heat ½ tsp of oil in a pan. Cook the whole mushroom on high flame for 2 mins with stirring continuously. Season with salt and pepper. Take out in a plate. Let it cool.
- Coat the mushroom with 1 tsp of corn flour. Mix properly.
- In a small bowl mix 1 tsp of corn flour in 1 tbsp of water. Keep aside we will require it in the late step.
- In the same pan heat ½ tsp of oil. Add the coated mushroom and cook for 2 mins on high flame with stirring continuously. The corn flour with get nicely coated over the mushrooms and it will avoid breaking of the mushrooms.
- Heat 1 tbsp of oil in a pan. Add chop garlic and green chilli. Sauté. Add chop onion, green red and yellow capsicum. Cook the vegetables on high flame. Season with salt and pepper. Cooking the vegetables will avoid overcooking of the vegetables and most importantly we do not want that the vegetables should release water because on seasoning with salt vegetables leaves water and the vegetables will become soggy and soft. we do not want this. do all the steps quickly, so keep all the required ingredients handy.
- Add chop spring onion and sauté for a minute
- Reduce the flame. Now add soya sauce and red chilli sauce. Mix properly.
- Add the corn flour water mixture according to the gravy or consistency required.
- Add the mushroom and mix.
- Garnish with green onion.
- Serve immediately.
Follow me on Facebook, Twitter, Instagram, Pinterest.
The post Chilli Mushroom Recipe appeared first on SpicenSweet.
]]>